Don't Get Wiped by Andariel! Diablo IV Lord of Hatred Strategy Guide
Tormented Andariel is one of the most punishing endgame Lair Bosses in Diablo IV: Vessel of Hatred, designed as a mechanical endurance test rather than a simple DPS check.
Boss Identity: Why Tormented Andariel Feels Brutal
Unlike her campaign version, Tormented Andariel is built around:
Stacking damage amplification debuffs
High-frequency poison burst mechanics
Arena-wide hazard layering
Punishing mistakes that snowball quickly
Each failed dodge doesn't just deal damage-it makes future hits exponentially deadlier, turning small errors into lethal situations late fight.
Core Mechanic: The Stacking Debuff System
The defining feature of this fight is a persistent stacking debuff applied whenever you are hit.
This causes:
Increased damage taken from all sources
Faster deaths in later phases
Reduced room for recovery after mistakes
By the final phase, even tank builds can be one-shot if they've accumulated too many stacks. The fight is effectively decided by clean execution from the start, not recovery play.
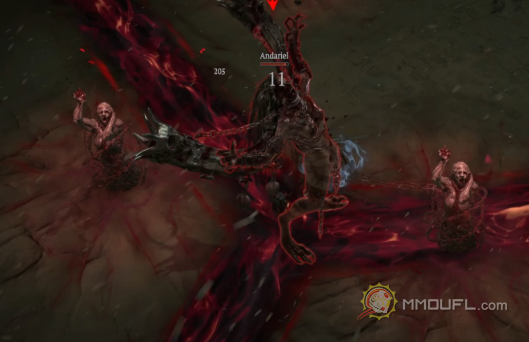
Phase 1: Poison Geometry & Movement Discipline
Early fight mechanics focus on spacing and positioning.
Key threats:
Poison Nova arcs: wide cone bursts requiring sidestep or pre-positioning
Ground rune seals: delayed explosions that chain outward
Slow-moving projectiles: punish stationary play
Core rule:
Stay at a diagonal angle or flank position.
Never stand directly in front of her wind-up animations.
This reduces exposure to overlapping hazard zones, which is where most deaths occur.
Effigy Intermission Phase (The Real Checkpoint)
At around 75% HP, Andariel becomes temporarily untargetable and summons three Effigies of Anguish.
During this phase:
The arena becomes filled with rotating hazards
Effigies must be destroyed quickly to continue
Slow clear = guaranteed stack overload + wipe risk
Priority system:
Burn Effigies immediately
Ignore boss presence completely
Rotate clockwise to avoid hazard overlap
AoE builds shine here; single-target builds must pre-plan movement routes.
Phase 2: Execution Phase (No More Mistakes Allowed)
Once Effigies are cleared:
Attack speed increases
Arena pressure intensifies
Stacking debuff becomes lethal quickly
Survival priorities:
Dodge first, DPS second
Avoid chaining damage zones
Never greed extra hits during dash windows
At this stage, one mistake often equals death, especially on Tormented difficulty.
Build & Preparation Recommendations
To stabilize the fight:
Stack poison resistance + armor
Bring at least one panic defensive cooldown
Prefer mobility skills (dash, teleport, evade resets)
Avoid pure glass-cannon setups unless heavily overgeared
Consistency matters more than raw DPS here. It is useful to buy Diablo 4 Items to help you get what you want.
Strategy Summary: How You Actually Win
To consistently beat Tormented Andariel:
Avoid stacking debuffs from the start
Play diagonally to minimize cone exposure
Delete Effigies instantly in intermission
Never stand still during poison zoning
Treat the fight as a movement puzzle, not a DPS race
Who This Guide Helps & What You Gain
This guide is designed for:
Endgame players farming Tormented bosses
Builds struggling with survivability checks
Solo players learning mechanical boss fights
You gain:
Clear phase-by-phase breakdown
Priority rules for Effigy control
Movement fundamentals that reduce deaths instantly
A repeatable strategy for consistent clears
Final Tip
If you're failing repeatedly, don't change damage first-change movement discipline. Tormented Andariel punishes panic positioning far more than low DPS. Clean spacing wins this fight every time.
———— Jun-08-2026 PST ————